Achieving a flawless complexion often starts with the perfect application of liquid foundation. This essential makeup product can create an even base, conceal imperfections, and provide a smooth canvas for the rest of your makeup.
However, applying liquid foundation correctly requires the right techniques and tools to ensure a natural, long-lasting finish.
Whether you’re a makeup novice or looking to refine your skills, mastering the art of applying liquid foundation can transform your beauty routine.
Understanding the steps involved in applying liquid foundation can make all the difference in achieving a polished look.
From prepping your skin to blending seamlessly, each step plays a crucial role in ensuring your foundation looks impeccable and feels comfortable throughout the day.
Follow this step-by-step guide to applying liquid foundation and discover how to enhance your natural beauty with a flawless, radiant complexion.
Step 1: Prep Your Skin
Cleanse and Moisturize
Before applying liquid foundation, it’s essential to start with a clean and well-moisturized face.
Cleansing removes dirt, oil, and impurities, while moisturizing ensures your skin is hydrated and smooth.
This step creates a perfect base for your foundation and helps it adhere better to your skin.
Apply Primer
Using a primer can help create an even surface for your foundation and extend its wear time.
Choose a primer that suits your skin type – whether it’s mattifying for oily skin, hydrating for dry skin, or color-correcting for uneven skin tones.
Apply a small amount of primer all over your face and allow it to set for a few minutes.
Step 2: Choose the Right Foundation
Find Your Shade
Selecting the correct shade of liquid foundation is crucial for a natural look.
Test foundation shades along your jawline in natural light to find the one that seamlessly blends with your skin tone.
The right shade should disappear into your skin without leaving a noticeable line.
Select the Right Formula
Different foundations cater to various skin types and coverage needs.
Choose a foundation formula that matches your skin type – oil-free or matte for oily skin, hydrating or dewy for dry skin, and long-wearing for combination skin.
Additionally, decide on the level of coverage you desire, whether it’s sheer, medium, or full.
Step 3: Apply Foundation
Tools for Application
The tools you use can significantly impact the finish of your foundation. Popular options include makeup brushes, sponges, and your fingers.
A dense foundation brush offers a fuller coverage, a beauty sponge provides a natural, airbrushed finish, and fingers allow for quick and easy blending.
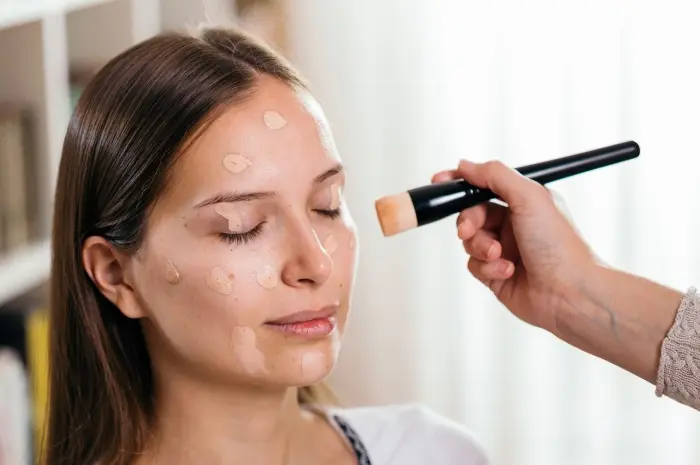
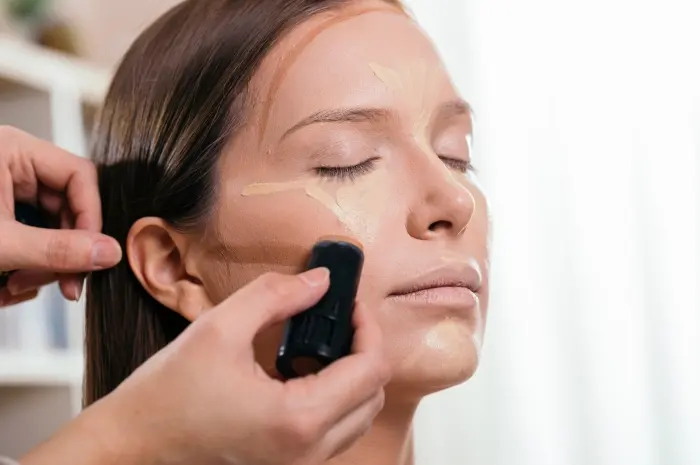
Dot and Blend
Start by dispensing a small amount of foundation onto the back of your hand. Using your chosen tool, dot the foundation onto your forehead, cheeks, nose, and chin.
Begin blending the foundation from the center of your face outward, using circular motions with a brush, dabbing motions with a sponge, or gentle strokes with your fingers.
Step 4: Build Coverage
Layer as Needed
For areas that need extra coverage, such as blemishes or redness, apply additional layers of foundation.
Use a smaller brush or the tip of your sponge to target these areas and blend seamlessly with the rest of your foundation.
Remember to build coverage gradually to avoid a cakey appearance.
Blend into Neck and Ears
To ensure a cohesive and natural look, blend your foundation down your neck and onto your ears.
This step prevents any noticeable lines or mismatched tones, especially if you’re wearing an open-necked top or pulling your hair back.
Step 5: Set Your Foundation
Use Setting Powder
To lock your foundation in place and reduce shine, apply a translucent setting powder.
Use a fluffy brush to dust a light layer of powder over your entire face, focusing on areas that tend to get oily, such as the T-zone.
This step helps your foundation last longer and provides a matte finish.
Setting Spray
For a more natural and dewy finish, consider using a setting spray. Hold the spray at arm’s length and mist it over your face to set your makeup and add a subtle glow.
Setting sprays can also help melt the powder into your skin for a seamless finish.
Step 6: Final Touches
Touch Up as Needed
Throughout the day, you might need to touch up your foundation, especially if you have oily skin or are wearing makeup for an extended period.
Carry a compact powder or blotting papers to absorb excess oil and maintain your flawless look.
Blend and Buff
After setting your foundation, give your skin a final blend and buff with a clean makeup sponge or brush.
This ensures all the products are well-blended and there are no harsh lines, giving you a smooth and even complexion.
Conclusion
Applying liquid foundation flawlessly requires attention to detail and the right techniques. By following this step-by-step guide, you can achieve a smooth, even complexion that serves as the perfect canvas for the rest of your makeup.
From prepping your skin and choosing the right foundation to blending seamlessly and setting your makeup, each step is crucial for a polished, long-lasting finish.
Practice these tips and tricks to master the art of applying liquid foundation, enhancing your natural beauty with confidence and ease.